Established in 2008

Updated July 20th, 2017

General Overview:

There are three servos.

 sentry gun turret sentry ptz camera targeting software paintball airsoftsentry gun turret sentry ptz camera targeting software paintball airsoftsentry gun turret sentry ptz camera targeting software paintball airsoft

One to control the turret's left and right movement (X Axis), one for the Y axis (up and down) and one to pull the trigger. Those 3 servos plug into a servo controller which is included in the Starter Kit.

sentry gun turret sentry ptz camera targeting software paintball airsoft

A computer receives the video feed and tells the servo controller where to point the turret using the servos. The Windows version of the Acer Aspire One ($250) is inexpensive and works great if you don't already have a laptop.

sentry gun turret sentry ptz camera targeting software paintball airsoft


Background info:

   Since your application may be different, I left buying the servos up to you. I personally use a Hitec 5645MG for the X and Y axis and cheap HS-322 for the trigger (if the trigger is really light). If the trigger is hard to pull then you may want to use a HS-645MG. The small gears I provide in the kit are for Hitec servos only. The servos you use need to have 180° of travel for the X and Y axis but 90° is fine for the trigger. The tools pictured below are all that should be needed for assembly.

sentry gun turret sentry ptz camera targeting software paintball airsoft

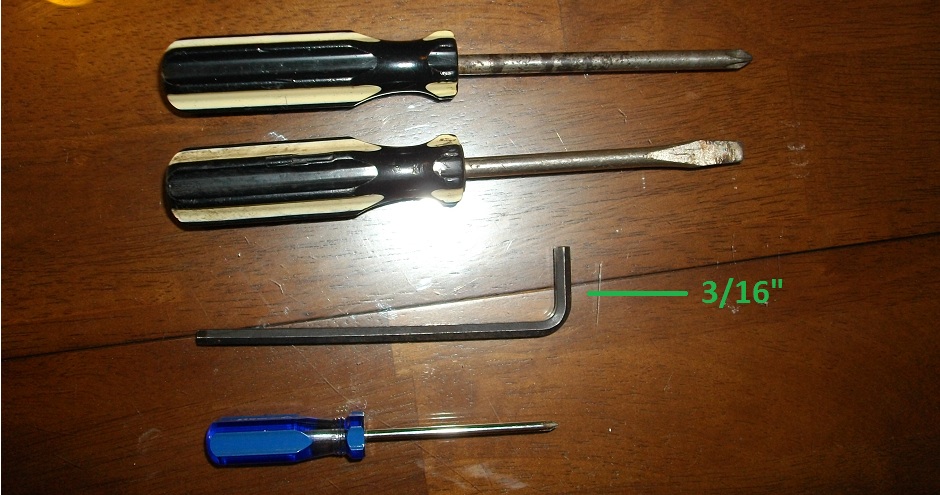
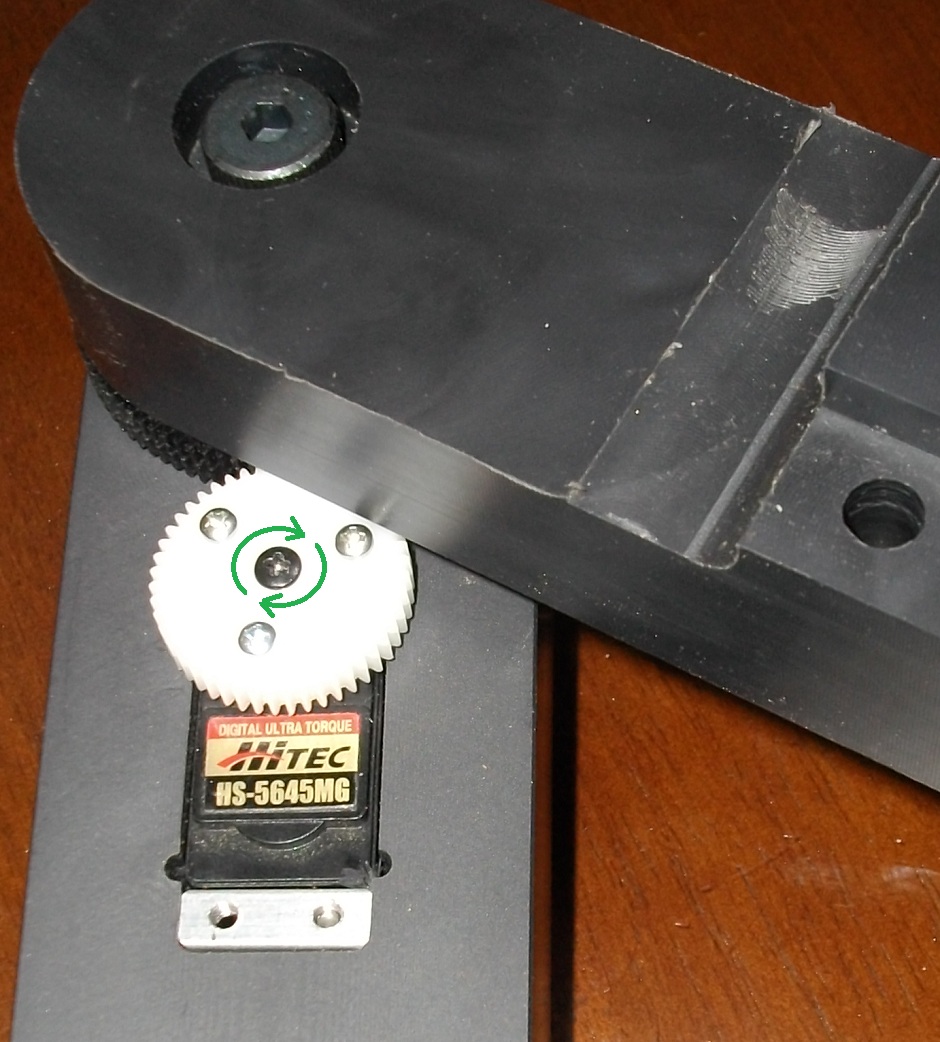
Step 1. Install The X and Y axis servos:

   Once the servos are installed the rest is relatively easy.

  1. Remove the servo horn (servo arm) from the servo with a small phillips screwdriver and place the servo in the mount as shown below.
  2. Put the servo arm back on it and turn it in the direction indicated by the green arrow until it bottoms out. Remove the servo arm.
  3. Put the 2 small aluminum plates into their slots as shown below.
  4. Put one screw in through the back of the servo and screw it in to the lower plate. Leave it loose enough so that the servo can still slide up and down.
  5. Do the same for the upper plate but in the opposite corner. Now you have a total of 2 screws in opposite corners holing the servo in its mount.
  6. Move the turret arm to the position shown below and mount the white gear to the servo. Tilt it a little to slide it under the turret arm and then rotate it if necessary to make the tiny teeth align to the servo spline and push it onto the servo.
  7. Put the little black screw back in that will hold the white gear to the servo.
  8. As you push the servo up so that the large and small gears are pressed together, use the normal sized phillips to tighten the screws that hold the servo in its mount. You don't really want any play in between the gear teeth.
  9. Repeat the same steps for the left and right axis servo but set the left and right limits where ever you need them depending on your application.
sentry gun turret sentry ptz camera targeting software paintball airsoft

Step 2. Install the trigger servo plate:

   Use a 3/16" Allen to mount the servo plate to the turret arm as shown below.

sentry gun turret sentry ptz camera targeting software paintball airsoft

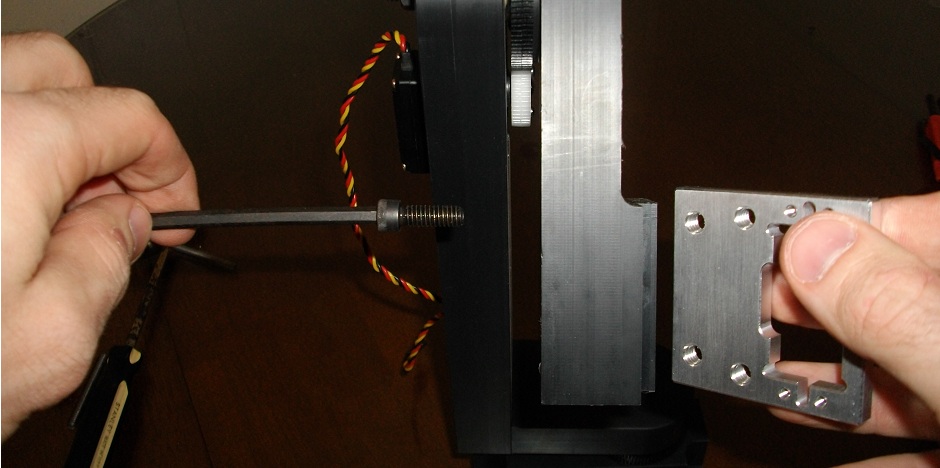
Step 3. Mount the pb/airsoft gun:

  1. Screw the 2 threaded rods in place as shown below. This can easily be done by hand.
  2. Put the pb/airsoft gun in place and use a flat-head screw driver to tighten the hose clamp while you hold the pb/airsoft gun in place (as shown below).
sentry gun turret sentry ptz camera targeting software paintball airsoft

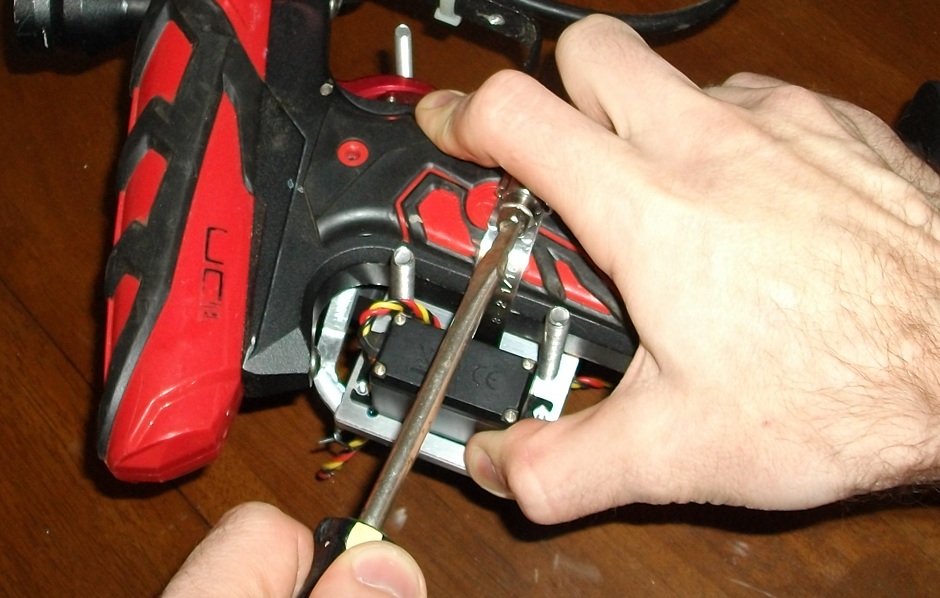
Step 4. Use 2 more screws to mount the trigger servo as shown below:

sentry gun turret sentry ptz camera targeting software paintball airsoft

Step 5. Screw the remaining small threaded rod into the farthest hole of the trigger pull-bar as shown below:

sentry gun turret sentry ptz camera targeting software paintball airsoft

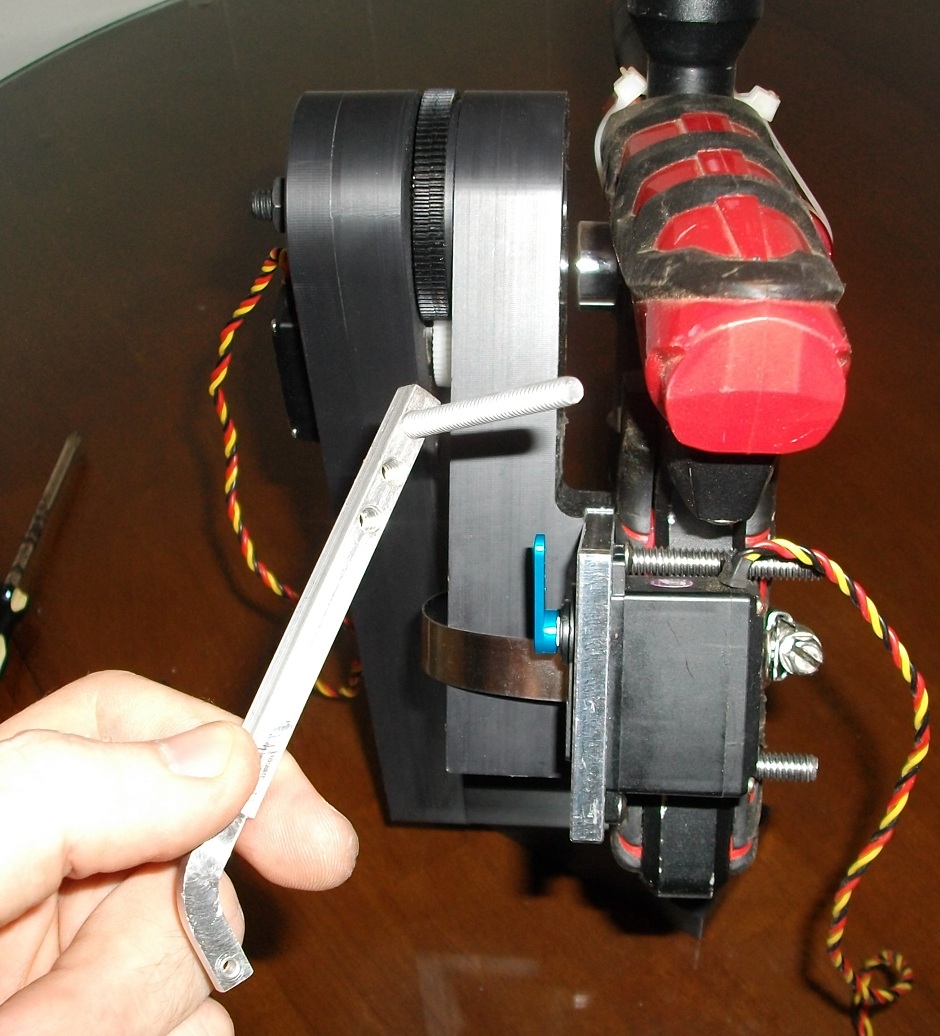
Step 6. Use a large paperclip or any other similar metal wire to bind the trigger pull-bar to the servo arm:
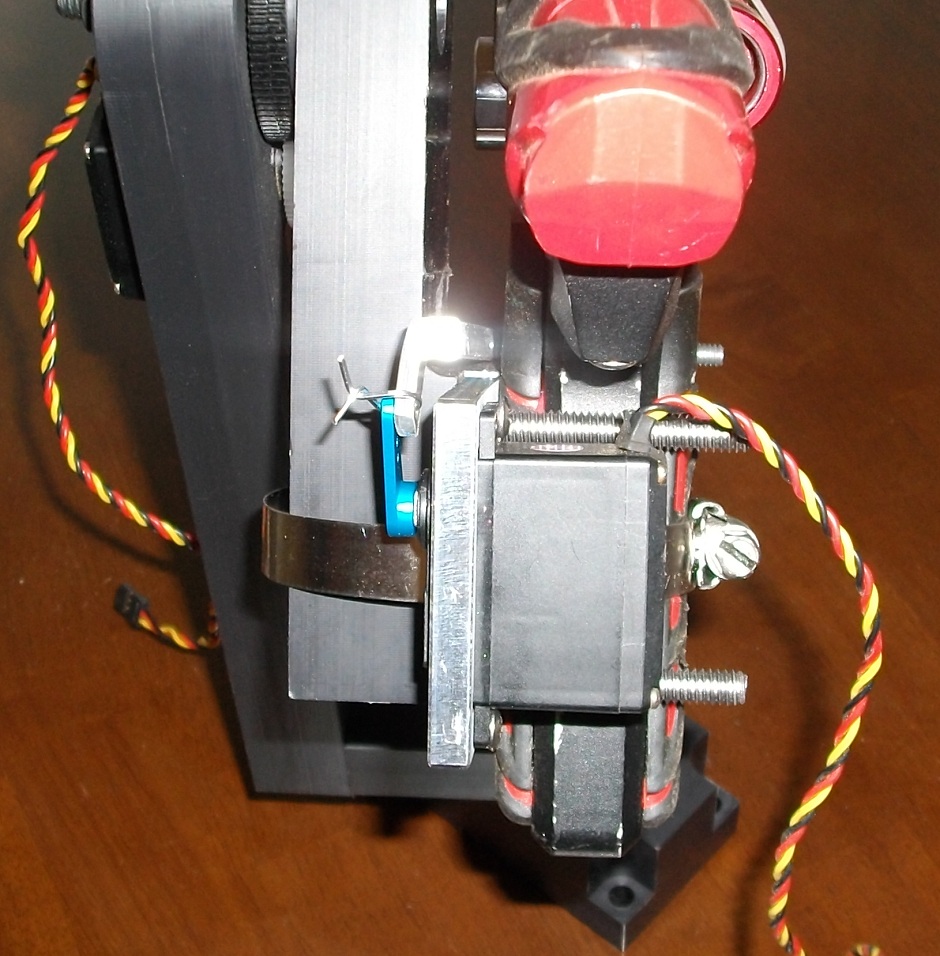
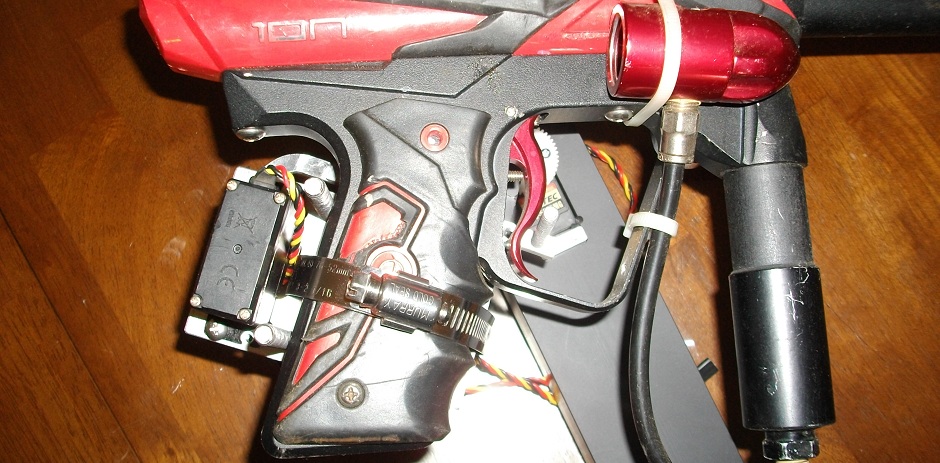
sentry gun turret sentry ptz camera targeting software paintball airsoft sentry gun turret sentry ptz camera targeting software paintball airsoft

Step 7. Wiring

Use two 12" servo extensions on the trigger and Y axis servos and plug them all into the servo controller. Channel 0 is the X axis (left and right), channel 1 is the Y axis (up and down), and channel 2 is the trigger. Servo power is right next to channel 0. Use zip ties or something similar to organize the wiring. Make sure no wiring will get pulled from the turret's movement.
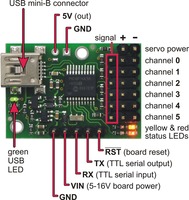
sentry gun turret sentry ptz camera targeting software paintball airsoft

Step 8. Camera:

   The image below shows the logitec pro 9000 mounted to the newer turret base. The new turret bases come with 2 holes already drilled for the camera. You will have to cut part of the camera mount so that it can slide in place as shown. Use superglue or something similar to make sure the camera is unable to move or rotate once you have it set up.

sentry gun turret sentry ptz camera targeting software paintball airsoft

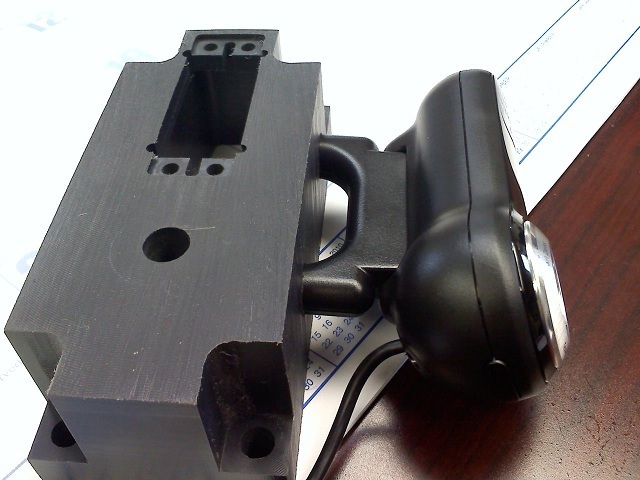
For best performance:

  1. Be on the lookout for any wobbling of the base as this will cause false targets to be detected.
  2. The gun barrel must not be visible to the camera as it will see itself as a target. This is not an issue if the barrel is, and always will be, outside of the target area.
  3. Measures must be taken to prevent the camera from shaking caused by turret momentum changes and/or an unstable surface. Lowering the acceleration value to around 5 or lower can help a lot.
  4. Calibration must be done correctly. You can verify calibration accuracy using mouse aiming mode.
  5. The Turret's range of motion must be greater than the camera's field of view. If the camera has a 70 degree FOV then the turret must be something greater, like 90 degrees.
  6. Use digital servos for higher accuracy and torque.
  7. The heavier the gun, the poorer the performance.